SAIS Canvas Basics
The Basics
- Access Canvas
- Access your Course(s)
- Update HelioCampus Syllabus (formerly AEFIS)
- Create Course Zoom Link
- eReserves (formerly Course Readings)
- Update Course Home Page
- Publish Your Course
Additional Information
Access Canvas
From the JHU Portal
- Login to https://my.jh.edu/
- Expand the Education Category
- Click the Canvas Tile
- Optionally click the heart icon on the tile to add it to My Favorites
If you do not see Canvas in the JHU Portal:
- Go to https://canvas.jhu.edu/
- Click on JHU Login
- Enter your JHED ID and Password
The Dashboard is the first thing you will see when you log into Canvas. The Dashboard helps you see what is happening in all your current courses
Access your Course(s)
Option 1: Select the course from the Dashboard by selecting the course card.
- Scroll down the unpublished to view your courses.
Options 2: Select the course from Courses on the Global Navigation menu
Note: you may see two types of courses in Canvas (1) academic courses and (2) stage courses. Academic courses will begin with the prefix ‘SA’, stage courses will begin with the prefix ‘STAGE’.
Academic course is where your course syllabus, course zoom link, eReserves and other course materials will be located for students to access. The stage course is content that was migrated from Blackboard that you can reference or copy to your academic course.
Update HelioCampus Syllabus
IMPORTANT INFORMATION: you will see two ‘syllabus’ links on the Canvas course menu, one called Course Syllabus and one called Syllabus. Course Syllabus is the HelioCampus (formerly AEFIS) syllabus, the other should be ignored and remain hidden from students. Follow these HelioCampus instructions to learn how to access HelioCampus in Canvas.
Create Zoom Course Link
Reminder from Academic Affairs:
All faculty are required to post a backup Zoom link in their course Canvas site. These links will only be utilized for classroom instruction if future changes require the school to shift to virtual instruction. This is not a substitute for students who do not want to attend the in-person session. Faculty should not be using these links to teach virtually unless previously approved by Academic Affairs. Faculty can use Zoom for office hours and to invite guest speakers to their classes.
Follow these Zoom instructions to learn how to access Zoom from within Canvas.
eReserves (formerly Course Readings)
The library’s eReserve system is integrated with Canvas. The system organizes readings by course and creates indexing that you can search or sort by author and title; upon request, Reserves staff will also organize your readings by assignment week, date, or topic. eReserves readings are available to faculty and enrolled students.
The process for requesting materials for your courses remains unchanged. Email [email protected]
Related JHU Canvas Guide: eReserves (i.e., ARES eReserves)
Update Course Home Page
Your Canvas course includes a simple course home page that you are encouraged to edit to welcome students to your course site.
To edit the home page:
- Login to Canvas and open your course you want to update
- Click Home
- Click Edit
- Optionally add a personalized welcome to your course
- Add/delete the course description place holder
- When done editing, click Save, to save your changes
Related Canvas Guides
- How do I use the Course Home Page as an instructor?
- How do I change the Course Home Page? [note: do not set the home page to Syllabus]
Publish your Course
In order for students to access your course, you must publish it. You may also unpublish a course if you want to hide it from students. Once your course contains a graded submission, you cannot unpublish your course.
Students will be able to see published courses two week prior to the term start. If you publish your course prior to the term start, students will NOT be able to see the course.
Follow these steps to publish your course:
- Login to Canvas and open the course you want to publish
- If you are not on the Home page, click Home in the Course Navigation Menu
- Click Publish in the right sidebar
- A message may appear at the top of your screen confirming the publishing of your course


Note: On smaller screens, the sidebar may display beneath other page content.
Related Canvas Guide: How do I publish a course?
Announcements
You can create an announcement to share important information with all users within your course and with users in sections of a course. In addition to receiving an email notification when an announcement is posted, the announcements feature allows students to directly access information on Canvas.
To create an announcement:
-
- Login to Canvas and open the course where you want to make an announcement
- Click Announcements in the Course Navigation menu
- Click +Announcement in the upper right

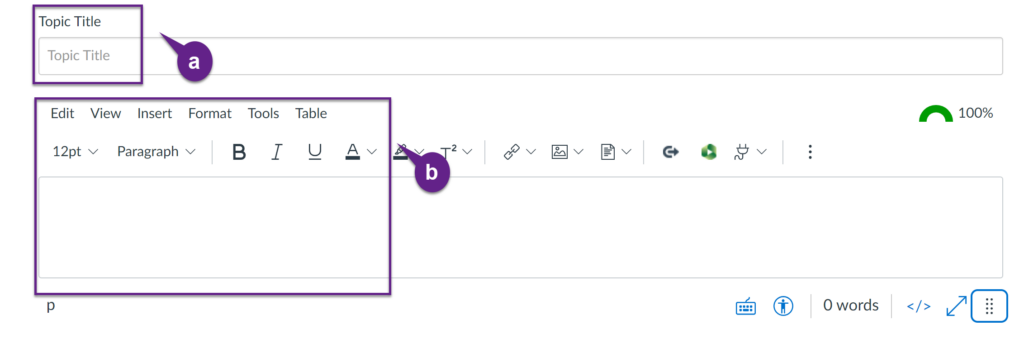
- Enter a title [a] for the Announcement in the Topic field
- Add content in the Rich Content Editor [b]
- You can choose to select various options for your announcement.
- Delay the posting of your announcement, which allows you to schedule the announcement for a future date.
- Allow users to comment on the announcement
- Require students to reply to a post before seeing other replies
- Enable an announcement podcast feed
- allow students to like announcement replies
- Click the Save button to post and send the announcement.

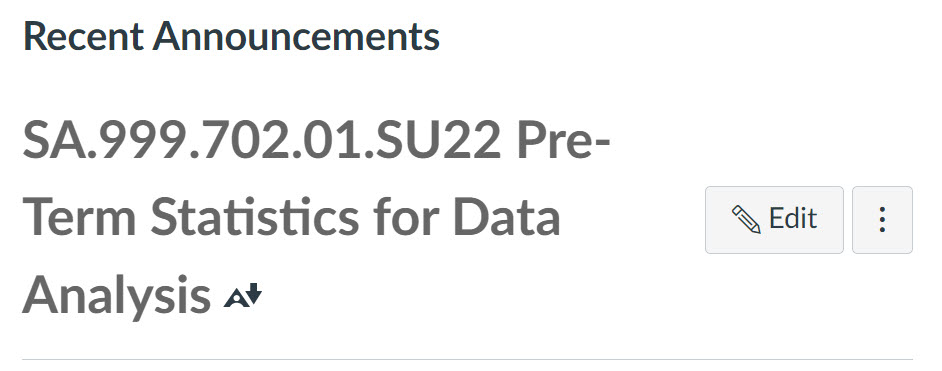
Note: By default, your home page will show the most recent two announcements above the page content.
Notes: Your course must be published for students to receive announcement notifications. If you import an announcement from another Canvas course, new announcement notifications will not send to course users.
If an announcement is created before the course start date and the students can only participate in the course between these dates setting is enabled, students will not receive announcement notifications before the start date.
Related Canvas Guides:
- How do I use the Announcements Index Page?
- How do I add an announcement in a course?
- How do I copy an announcement to another course?
Modules
Canvas Modules structure course content by day, week, unit, topic, or outcome. Modules help simplify student navigation through a course and ensure a sequential flow of content. With Modules, instructors can require interaction with content before completing assignments.
Each Module can contain files, discussions, assignments, quizzes, and other learning materials. Modules are a great way to start building your course because you can manage everything in one place.
- Login to Canvas and open the course where you want to create a module
- Click Modules in the Course Navigation menu
- Click +Module in the upper right

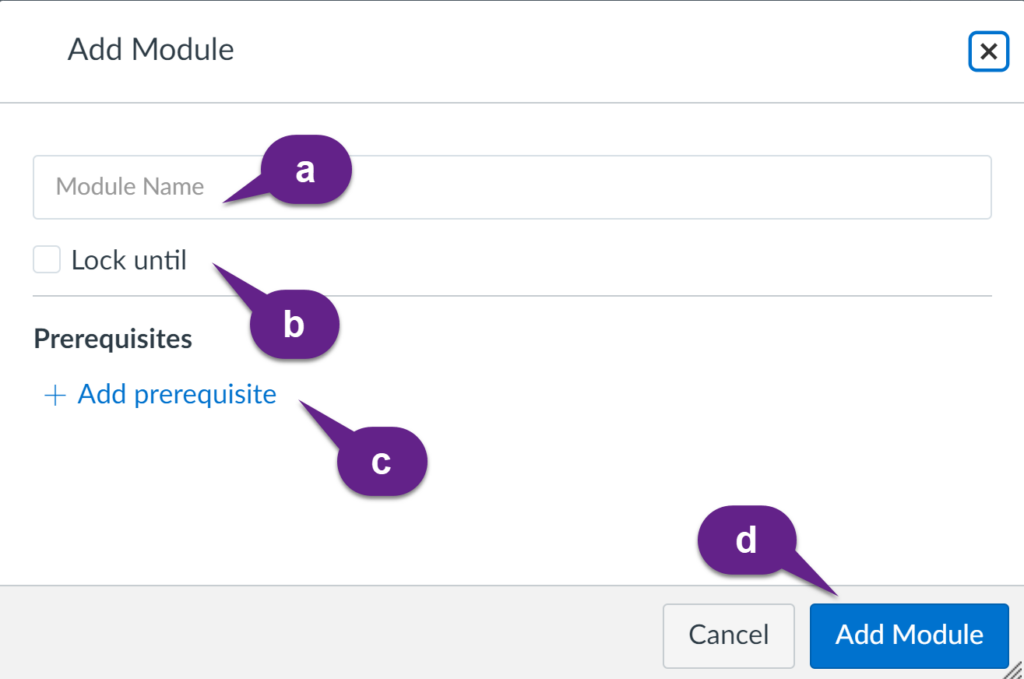
- Enter a name in the Module Name field [a]
- Optional restrict the module until a specific date, by locking the module [b]
- Optional require a prerequisite module [c]
- Click Add Module to create the module [d]
- Add items to the module by clicking the Add icon [a] or drag and drop files [b] to an empty module.
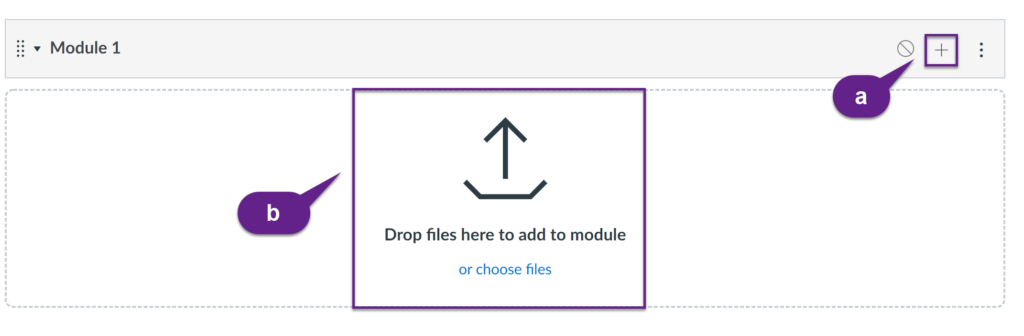
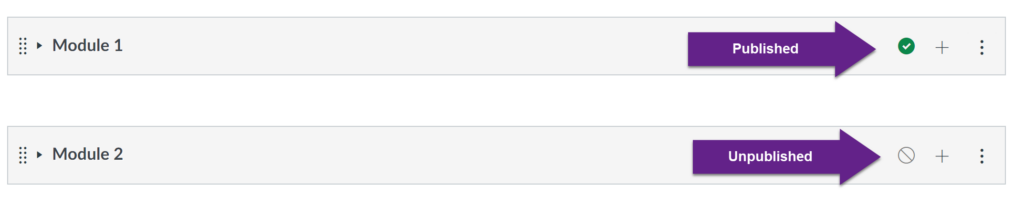
- Publish the module by clicking the unpublished icon. The icon will turn green to indicate the module is published and viewable to students
- Publishing a module will automatically publish any unpublished content items within the module.
- To unpublish a module, hover over the published icon. The hover text will confirm you want to unpublish the module. Click the icon to confirm.
- Publishing a module will publish all module items, you can manually unpublish individual module items later. Students cannot view unpublished module items as part of a published module.
You can add assignments, discussions, files, pages and quizzes to a module.
Related Canvas Guides:
- How do I add a module?
- How do I publish or unpublish a module as an instructor?
- Learn much more: Canvas Modules
Copy Course Content
Using the Import Existing Content tool, you can copy content from term to term. You can choose to copy all the course content or select specific content from the previous course. Note: You must be the instructor in both courses to copy to content. This will not copy over the course syllabus content or class roster. If you would like assistance copying your Canvas course content, please email [email protected]* *Do not share any personal identifiable information (PII) such as social security numbers or grades in any messages to [email protected].
- Begin in the Canvas course where you wan to import the content into
- On the Homepage, click Import Existing Content from the right menu, below Course Status
- Click Copy a Canvas Course from the Content Type menu
- Search for your course by entering the full course ID or course name in the Search for a course bar (e.g. SA.600.100.01.FA23)
- Click the name of the course when it appears
- Select the Content you want to copy: All Content or Select Specific Content**
- All Content imports all course content including announcements, course settings
- Select Specific Content** allows you to choose what content you want to import into the new course
- Optionally, you can choose Adjust events and Due Dates
- Click Import
**If you clicked Select Specific Content you must select the Content by clicking Select Content to the right of the Course Copy information located below Current Jobs.

Visit JHU Canvas FAQ for Faculty for lots of great tips and tricks!